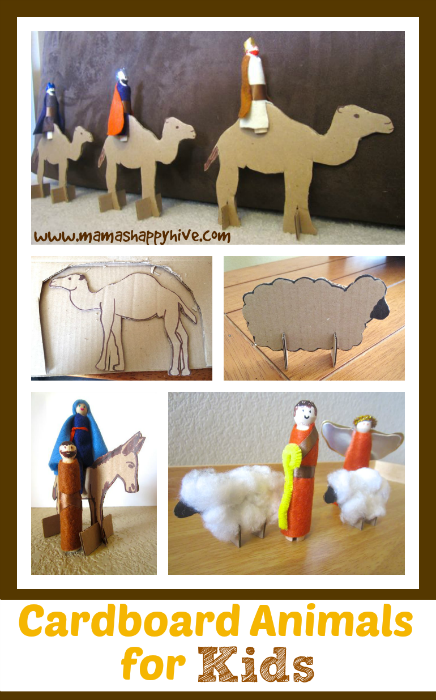
These cardboard animals for kids were super fun and easy to make! Children of all ages (maybe even a few adults too) can enjoy decorating these animals and playing with them for hours of creative fun! If you have an older preschool aged child, they may even be able to help you cut out the animals with adult supervision. This is day 7, 11, and 17 of the 25 day countdown series, 25 Hands-On Nativity Lessons for Kids. Below, I will explain how I crafted cardboard sheep, a donkey, and camels. These tips can be used for crafting any cardboard animal. Enjoy!
Materials Needed for Cardboard Animals
- Cardboard (Box)
- Magic Marker (brown and/or black)
- Scissors
- Cotton Balls and Glue (for sheep)
- Plain White Copy Paper & Pencil for Sketching
 Cardboard Sheep
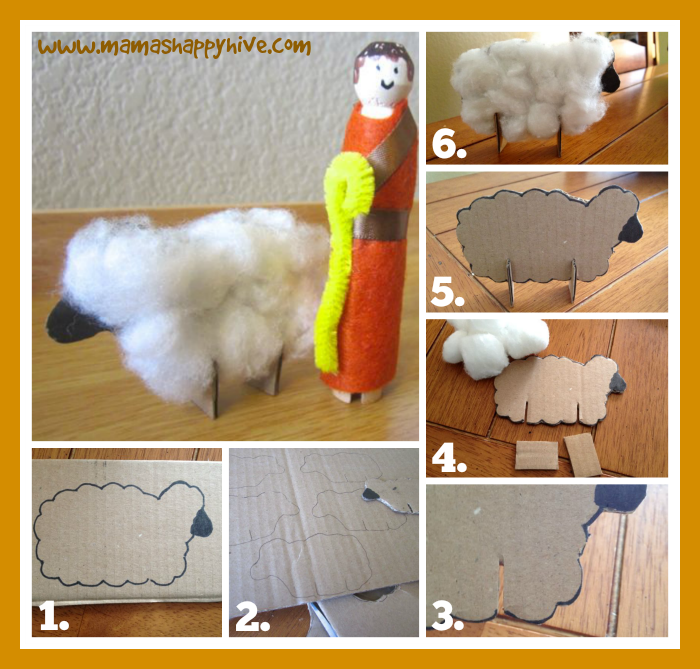
1. Start by drawing an outline of a sheep as shown above with a pencil and then trace over the edge with a magic marker. Color in the nose with a black magic marker. 2. Draw a line where the legs will go. 3. Cut a slit for the legs as shown in the photo. 4. Cut out two cardboard rectangular legs. 5. Insert the legs into the slits, adjust/cut the legs until they fit and the sheep can stand up on its own. 6. Have fun glueing on the cotton balls for the wool coat.
 Cardboard Donkey
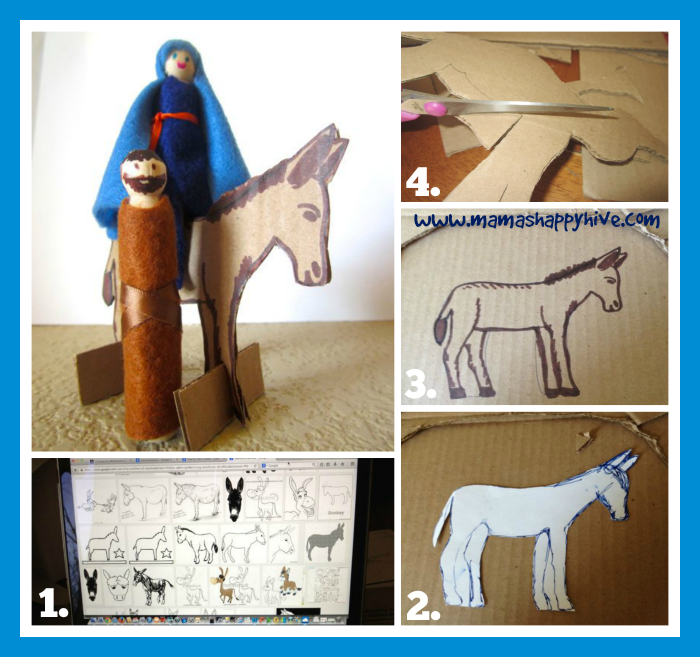
1. To find inspiration for drawing the outline of my donkey, I always start by googling the outline for the object I desire to sketch. If sketching an outline is too hard, you can always google an outline of a donkey and print it out. Adjust the size on your printer until you find the size that works. If you sketch, use a pencil on plain white copy paper until you have the desired look. 2. Cut the donkey out and use it as an outline on your cardboard. Trace the donkey with a brown magic marker. 3. You can leave the donkey as an outline or you can add details to the donkey using the brown magic marker. 4. Cut the donkey out of the cardboard, leaving uncut cardboard space between the legs. For the tight corners, cut into the corner from both angles as shown in the photo above. Finally cut slits in between the legs for the rectangular cardboard pieces as explained for the sheep. Adjust the rectangular pieces until the donkey can stand up on his own.
 Cardboard Camel
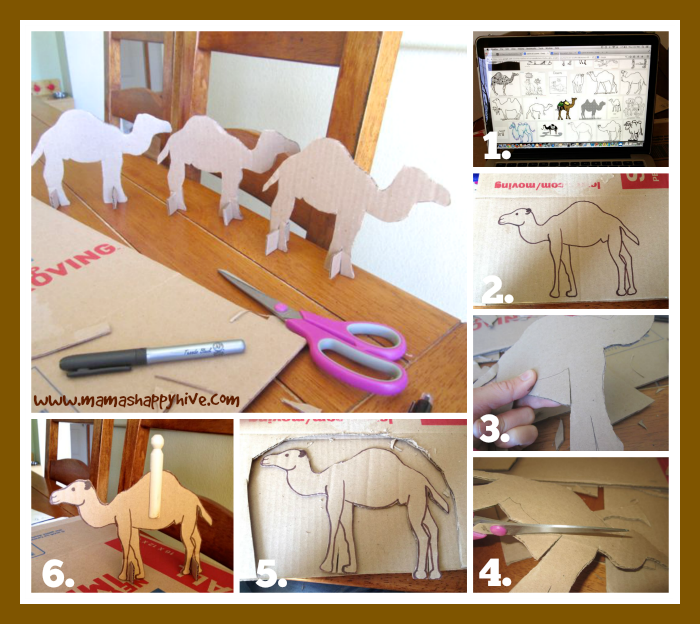
1. I googled an outline for a camel and sketched it free-hand on plain copy paper as described above for the donkey. 2. I cut the outline out and traced it onto the cardboard with a brown magic marker. 3. I cut the camel out, leaving intact cardboard in between the legs. 4. For the tight corners, cut into the corner from both angles as shown in the picture above. 5. Cut slits into cardboard space between the camels legs and also cut out rectangular cardboard pieces. 6. Insert the rectangular pieces until the camel can stand up on his own.
For step-by-step instructions on how to craft wooden peg people who can ride on the cardboard animals, visit - Biblical Wooden Peg People Craft Tutorial.
Thanks for your visit!


LOVE this — what a great solution when you might not have access to the animals you want to teach!
Thank you! 🙂
This is such a neat idea! I love it! 🙂
I love how simple this is. Thank you for the motivation for a project that won’t cost a dime!
Love the camels!